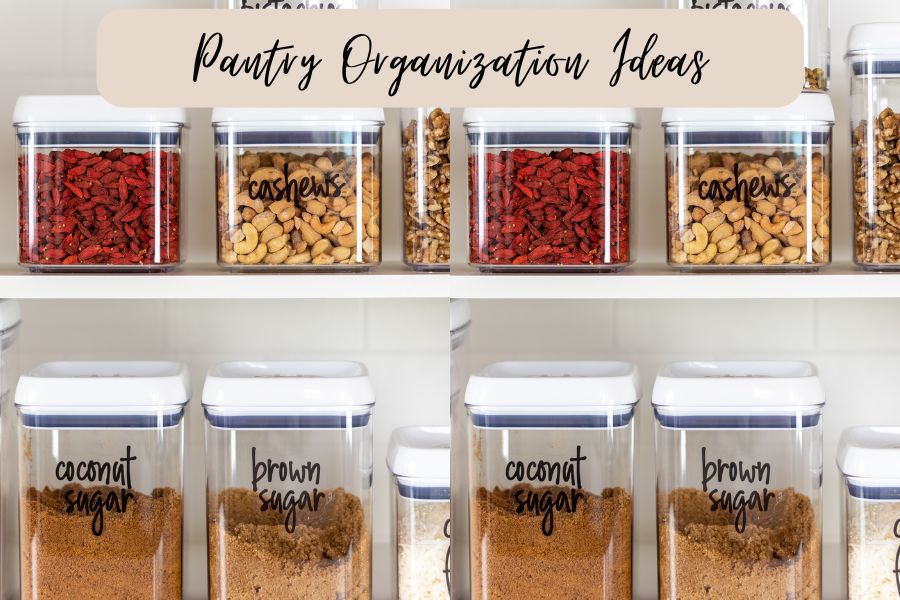
These 13 Pantry Organization Essentials will make your home feel lighter and more functional!
This post contains affiliate links, which means I’ll receive a commission if you purchase through my link, at no extra cost to you. Please read the full disclosure here.
Listen, I tend to be a passionate person. When I am into something, I am ALL into something. I’m passionate about many things: food & nutrition, fitness, business, investing, travel, and much more. But among my many passions is my fire and excitement for organization.
I have been called a minimalist before, but I don’t consider myself a minimalist. We have A LOT of stuff. But I think it appears as though we are minimalist because of the way things are organized. Everything has a home. And even though we have a lot of stuff, it looks clean and not chaotic!
In today’s post, I am going to highlight my favorite pantry organization items as well as give you a step-by-step guide to cleaning out your pantry and setting up a system for keeping it organized! Really quick, before we dive into today’s content, I want to remind you that I have a full line of culturally inspired spice blends that are completely salt and sugar-free. If you are interested, check it out here!
This post is all about Pantry Organization Ideas!
Why Is Organization Important?
We covered this more in-depth in my 13 Genious Amazon Fridge Organization Ideas and in my 5 Quick Tips For How To Organize Your Kitchen posts, but let’s briefly touch on it again!
- It’s a time-saver: staying organized means less time spent looking for things
- It’s a money-saver: when you know where everything is, you won’t buy duplicates of items you already have. When it comes to food, organization means less food spoilage. Food waste = money waste.
- It’s a sanity saver: less time pulling your hair out looking for things AND overall creates a more serene environment!
[the_ad id=”3378″]
Organize Your Pantry Step-By-Step
Step 1: Take Everything out
It’s gotta get worse before it gets better. Take everything out and place it in one area so you can clearly see everything you have. This step is crucial to being efficient in the process. I promise it will make it harder in the long run.
Step 2A: Sort
This step will take the longest, but will have the biggest impact on the result! Here are my steps in the sorting process:
- If there is anything that you KNOW has been around for way too long (like an open bag of chips that is probably stale or a bottle of red wine vinegar that hasn’t been touched in years) – toss it.
- As you sort through everything, make sure you check expiration dates or take a look at the item to make sure it still looks fresh and/or that the bag or box isn’t ripped. One time, I had a bag that was ripped and a bunch of ants found their way into the food item!!! Another time, we got a mouse that chewed through some bags (grossssss)!! Anything that is expired or just needs to go because of one of the reasons listed above – toss it!
- Place like items with like items: canned items, snack items, pasta, pantry staples, dried beans, or baking supplies. The categories highly vary from household to household. Some people may keep several types of pasta on hand at once, another household might have a lot of baking supplies. Choose categories based on what you have and your overall lifestyle/how often you buy certain pantry items.
- Based on your categories, this is where you can decide what kind of storage containers you need. Are you a big cereal family? Maybe you will need several cereal containers. Do you always have plenty of canned items? Consider a can organizer!
[the_ad id=”3378″]
Step 2B: Organizers (optional, but highly recommended)
This step is optional but highly encouraged! I have a list of my favorite pantry organizers below with shoppable links. But this step would require 2 things:
- Purchasing the products that best suit your pantry/lifestyle and the food categories you determined.
- Emptying your food items into your new organizers! Like emptying your cereal into your cereal container or your flour into your flour container!
Step 3: Clean
Before putting everything back, give your pantry a nice wipe-down. Clean it from top to bottom. I bet you can get this done in less than 15 minutes – set a timer and get after it. Easy step!
Step 4: Find A Home
This step depends on the type of pantry you have. Some have a closet, some have a cabinet, and some have a walk-in pantry. The key here is to keep like items with like items. For example, find a spot for your canned items, a spot for your snacks, and a spot for your pantry staples. The biggest thing to consider is how this pantry will best work for you and your family’s lifestyle. Not everyone will have the same system!
If you have littles, you may decide you want to keep certain snacks up higher and certain ones within reach. If your pantry doubles as a space for small appliance storage, you may want to section off space for those and so on.
You May Also Like:
- 11 Meal Prep Tips For A Stress-Free Week
- 11 Meal Prep Essentials
- 5 Quick Tips For How To Organize Your Kitchen
- 13 Genius Amazon Fridge Organization Ideas
[the_ad id=”3378″]
13 Amazon Pantry Organizers
Here are my favorite pantry organization products in no particular order:
1. Can organizer
I have this can organizer and absolutely love it! It helps me use the vertical space on my pantry shelf and eliminates the chaos of stacking cans on top of each other – making them easier to reach!
2. Acrylic Pantry Organizers
Any sort of acrylic bins can be used for a variety of different food items. In particular, anything that doesn’t require to be air tight such as individually packed snacks, drinks, jarred items, or produce that can be kept at room temperature (such as potatoes, tomatoes, or apples)! Here is another option – the dividers make this option perfect for organizing bars or snacks!
If you aren’t into acrylic, try this plastic basket woven design!
3. Premade Labels
These labels are perfect for easily labeling all of your jars and bins! Click here for a second option that has a more minimal vibe!
4. Airtight Containers
These containers are perfect for pantry staples and bulk snacks – like pasta, flour, sugar, rice, dried beans, granola, trail mix, candies, and more!
5. Large Bins
These bins are PERFECT for bigger items like sealed bags of chips or backstock items like backup olive oil or spices!
6. Mason Jars
I love using some sort of airtight jars for smaller items like nuts & seeds!
[the_ad id=”3378″]
7. Under Shelf Basket
I use these under-shelf baskets for backup foil or parchment paper or even carb items like bread, tortillas, or English muffins.
8. Acrylic Lazy Susan
This lazy Susan can be used for vinegars, oils, or shelf-stable condiments!
10. Pantry Door Organzier
These are perfect for those of you trying to maximize your space!
11. Shelf Organizer
These shelf organizers allow you to use more of the vertical space in your pantry shelves! Here is a second option to consider for maximizing your vertical shelf space!
12. Stackable Water Bottle Organizer
This is the perfect solution to your water bottle problem. It allows you to easily grab all your various water bottles and use your vertical space!
13. Create Your Own Labels
This style of label is more geared toward any sort of basket or bin without a lid! You can customize them to your needs!
P.S. Click here to shop the entire list in one place!
This post was all about Pantry Organization Essentials.
Did you try these items? Make sure to tag me @thespicegirlkitchen_ on Instagram or @thespicegirlkitchen on TikTok! I love seeing you CRUSH IT! I will be your ultimate hype woman!
Want to learn more about Kelsey? Click here to read her story!

