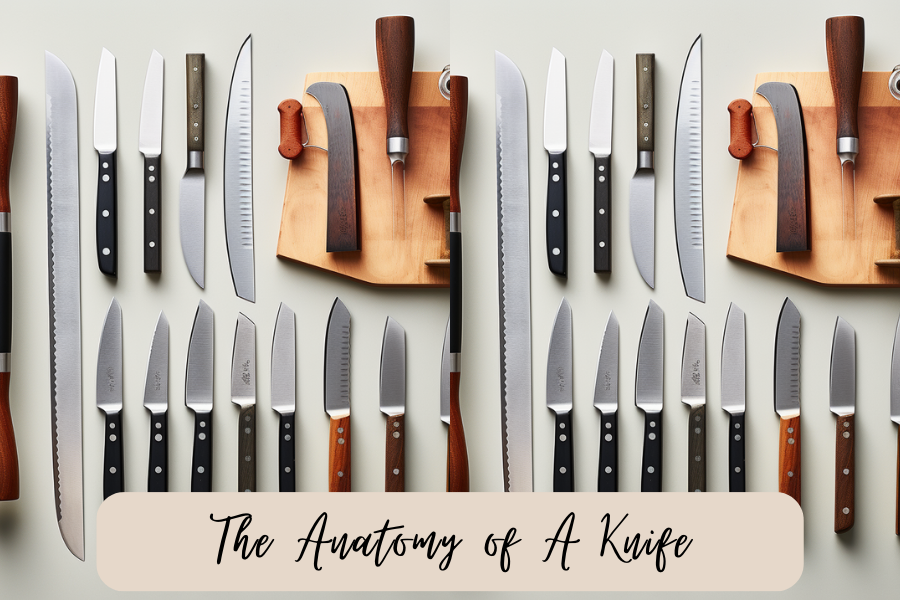
Ever wanted to know the anatomy of a knife? Understanding knife anatomy can aid in your knife skills overall! This post will teach you about each part of the knife and the functions it serves. Plus, we will dive into types of knives and their uses.
This post contains affiliate links, which means I’ll receive a commission if you purchase through my link, at no extra cost to you. Please read the full disclosure here.
A knife is one of humanity’s oldest and most versatile tools. From kitchen tasks to outdoor adventures, knives have played a crucial role throughout history. In this blog post, we’ll dissect the anatomy of a knife, exploring each part and its unique function. Plus, we will dive into the types of knives and their functions.
Just a quick reminder before diving into today’s post, I have a complete line of salt & sugar-free spices that are culturally inspired. It is the perfect way to (literally) spice up your everyday cooking! Check out the spice line here! And feel free to message me if you have any questions!
This post is all about the anatomy of a knife!
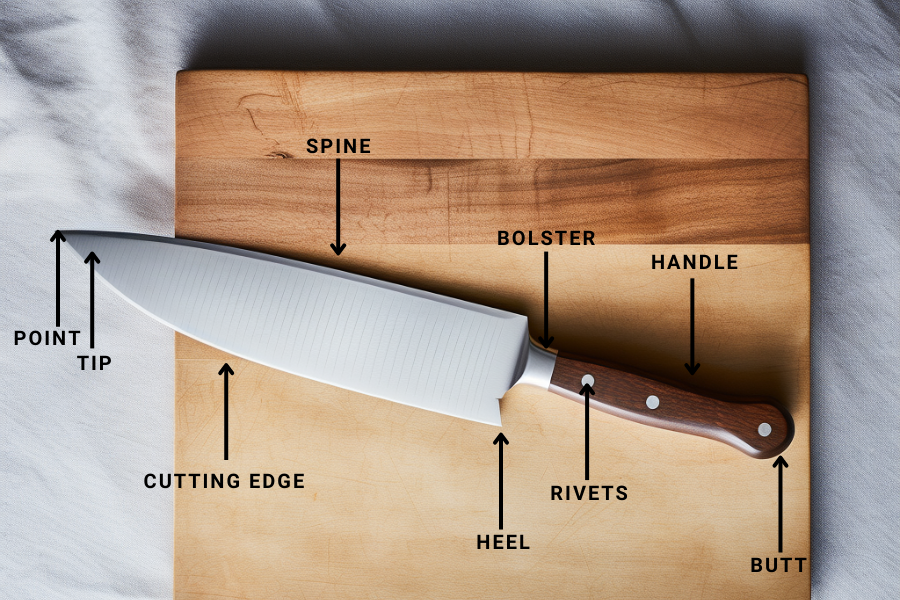
Anatomy of A Knife
Blade/cutting-edge
The blade is the heart of any knife. It comes in various shapes, such as straight, curved, or serrated, each designed for specific tasks. The edge, or cutting surface, is the primary contact point with the object being cut. High-quality blades are crafted from materials like stainless steel or carbon steel for durability and sharpness.
Tip
Situated at the end of the blade, the tip is crucial for precision and detail work. Different tip designs, including spear point, drop point, and tanto, each serving specific purposes. The tip’s shape impacts the knife’s ability to pierce, slice, or perform intricate cuts.
Spine
The spine runs along the top of the blade, opposite the cutting edge. Its thickness and curvature influence the knife’s overall strength and flexibility. A thicker spine provides durability for heavy-duty tasks, while a thinner spine enhances precision and slicing ability.
[the_ad id=”3378″]
Tang
The tang is the extension of the blade into the handle. A full tang extends through the entire handle, offering strength and stability. Knives with partial tangs may compromise on durability, making full tang knives preferable for demanding tasks.
Handle
Handles come in various materials, such as wood, plastic, or metal, and can significantly affect the knife’s grip and comfort. The handle’s design, shape, and texture are crucial in preventing slips and ensuring control during use. Ergonomics (the study of designing and arranging things to enhance efficiency) are key for reducing hand fatigue during prolonged use.
Bolster
Located at the base of the blade where it meets the handle, the bolster adds balance and stability to the knife. It also protects fingers from slipping onto the blade during use. Some knives have a full bolster, while others have a partial or no bolster at all, depending on the intended use.
Types of Knives
Chef’s Knife
– Purpose: Versatile, all-purpose knife for chopping, slicing, and dicing.
– Characteristics: Broad blade with a curved edge for rocking motion during cutting.
Click here to shop my favorite chef’s knife!
[the_ad id=”3378″]
Paring Knife
– Purpose: Precision tasks, such as peeling, trimming, and intricate cutting.
– Characteristics: Short blade, usually 3-4 inches, ideal for controlled movements.
Click here to shop my favorite pairing knife!
Bread Knife
– Purpose: Slicing through bread without crushing it.
– Characteristics: Serrated edge for clean cuts through crusts without tearing the bread.
Click here to shop my favorite bread knife!
Santoku Knife
– Purpose: Japanese multipurpose knife for slicing, dicing, and chopping.
– Characteristics: Shorter, wider blade with a unique shape, ideal for precise cuts.
Click here to shop my favorite Santoku knife!
[the_ad id=”3378″]
Utility Knife
– Purpose: Versatile knife for tasks that fall between a paring and chef’s knife.
– Characteristics: Mid-sized blade, suitable for various cutting needs in the kitchen.
Click here to shop my favorite utility knife!
Boning Knife
– Purpose: Removing bones from meat and filleting fish.
– Characteristics: Narrow, flexible blade for maneuvering around joints and bones.
Click here to shop my favorite boning knife!
Cleaver
– Purpose: Heavy-duty knife for chopping through bones and tough materials.
– Characteristics: Thick, durable blade with a broad surface for efficient cutting force.
Click here to shop my favorite cleaver!
[the_ad id=”3378″]
Fillet Knife
– Purpose: Filleting and preparing fish.
– Characteristics: Flexible, narrow blade for precise filleting movements.
Click here to shop my favorite fillet knife!
Steak Knife
– Purpose: Cutting through cooked meats at the table.
– Characteristics: Serrated or straight-edge blade for effortless slicing.
Click here to shop my favorite steak knives!
[the_ad id=”3378″]
How To Sharpen A Knife
There are a bunch of tools on the market specific for knife sharpening, but the below method will walk you through the best method of knife sharpening. This is a must-have skill if you plan on cooking regularly!
What you need
– Sharpening stone (whetstone), preferably with coarse and fine grits. Click here to shop what I use.
– Honing rod (optional for maintaining the edge between sharpening sessions).
– Towel or non-slip mat to stabilize the stone.
Inspect the Blade
– Check for nicks, chips, or significant damage. If present, use a coarse grit stone first to address these issues.
Soak the Stone
– If using a water stone, soak it in water for the recommended time. Oil stones don’t require soaking.
[the_ad id=”3378″]
Secure the Stone
– Place the stone on a stable surface, ensuring it won’t slip during sharpening.
Choose the Correct Angle
– Most kitchen knives have a bevel angle of around 15-20 degrees. Match the existing angle when sharpening.
Start with Coarse Grit
– Begin with the coarse side of the stone for initial sharpening. Hold the knife at the chosen angle and make controlled passes along the entire length of the blade.
Maintain Consistency
– Apply even pressure and maintain a consistent angle throughout the sharpening process. Repeat on both sides of the blade.
[the_ad id=”3378″]
Switch to Fine Grit
– Move to the finer grit for honing and refining the edge. Repeat the sharpening process on both sides.
HONE WITH A ROD (Optional)
– If using a honing rod, hold it vertically and stroke the blade downward, maintaining the chosen angle. This helps maintain the edge between sharpening sessions.
Test the Sharpness
– Carefully feel the edge with your fingertip or perform a paper or tomato test to check for sharpness.
Clean and Store
– Clean the knife to remove any metal particles. Properly store the knife to protect the sharpened edge.
Regular Maintenance
– Hone the knife regularly to keep the edge aligned and sharp. Periodically repeat the sharpening process as needed.
Remember, practice is key to mastering knife sharpening. Take your time, focus on maintaining a consistent angle, and soon you’ll be able to keep your knives razor-sharp with confidence!
[the_ad id=”3378″]
You May Also Like
If you liked this post, you may also be interested in our other kitchen tip posts.
- 5 Quick Tips for How to Organize Your Kitchen
- 11 Meal Prep Tips For A Stress-Free Week
- 11 Meal Prep Essentials
- 13 Genious Amazon Fridge Organization Ideas
OR click here for the entire “in the kitchen” category!
[the_ad id=”3378″]
This post was all about The Anatomy of A Knife.
Did you try these tips? Make sure to tag me @thespicegirlkitchen_ on Instagram or @thespicegirlkitchen on TikTok! I love seeing you CRUSH IT! I will be your ultimate hype woman!
Want to learn more about Kelsey? Click here to read her story!

