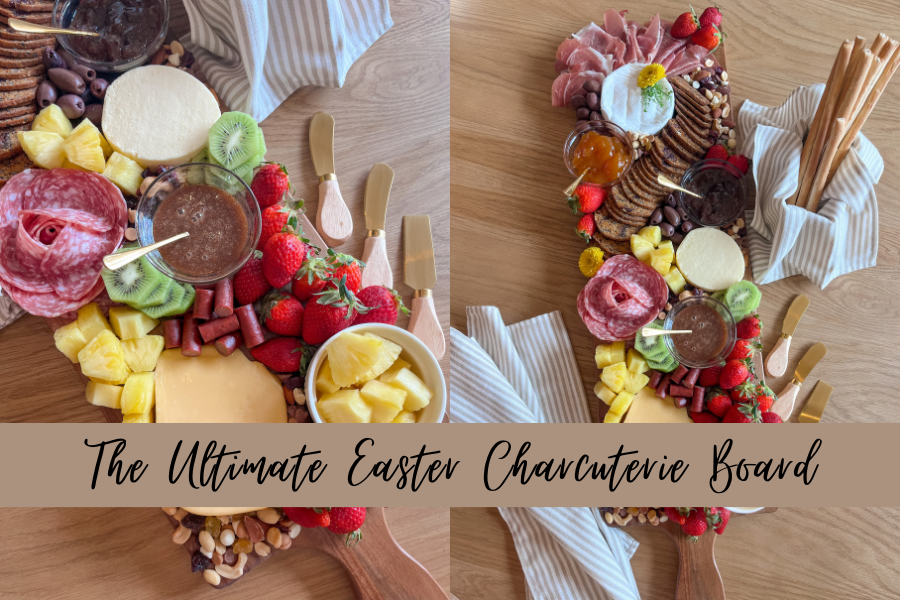
Looking to impress your family with an Easter Charcuterie Board?! Here is the fool-proof formula for building the ultimate spread this Easter.
This post contains affiliate links, which means I’ll receive a commission if you purchase through my link, at no extra cost to you. Please read the full disclosure here.
I’ve said it once and I’ll say it again – I love lazy ways to impress people. Charcuterie boards are one of the easiest ways to impress your guests with minimal effort because there is very little (if any) actual cooking involved.
Charcuterie has become very popular, and for good reason! It makes a fantastic appetizer for your dinner parties or just a snack to pick on during wine nights. They invite people to congregate around the same table, build their perfect bite, and savor the moment with friends or family.
In this post, you will learn how to build The Ultimate Easter Charcuterie Board that will make your guests feel extra welcome. You will learn the formula of what makes a great charcuterie board, what fruits & veggies are in season, and tips on how to make your board REALLY pop.
This post is all about how to build The Ultimate Easter Charcuterie Board.
The Charcuterie Formula
Even if you have never stepped foot in a kitchen before, I bet you could still put together an impressive spread. It’s easy to make a beautiful presentation in just a few simple steps. A charcuterie board requires minimal (if any) cooking and minimal knife skills. It mostly entails assembly, which also makes it a kid-friendly kitchen activity!
Side note: The only time a charcuterie would require cooking is if you decided to make your jams from scratch, bake your bread, or candy your nuts. While that’s great, odds are you have a million other things to worry about in preparation for your Easter hunt or dinner party. So I would suggest just buying the jams, bread, and candied nuts from your local store or farmers market. Maybe save the “from scratch” charcuterie for a Sunday wine night instead – or not. I won’t tell!
The Law of 3
I like the idea of everything coming in threes on a charcuterie board. This is, of course, not a hard-and-fast rule. However, if you don’t know where to start, just remember the law of three.
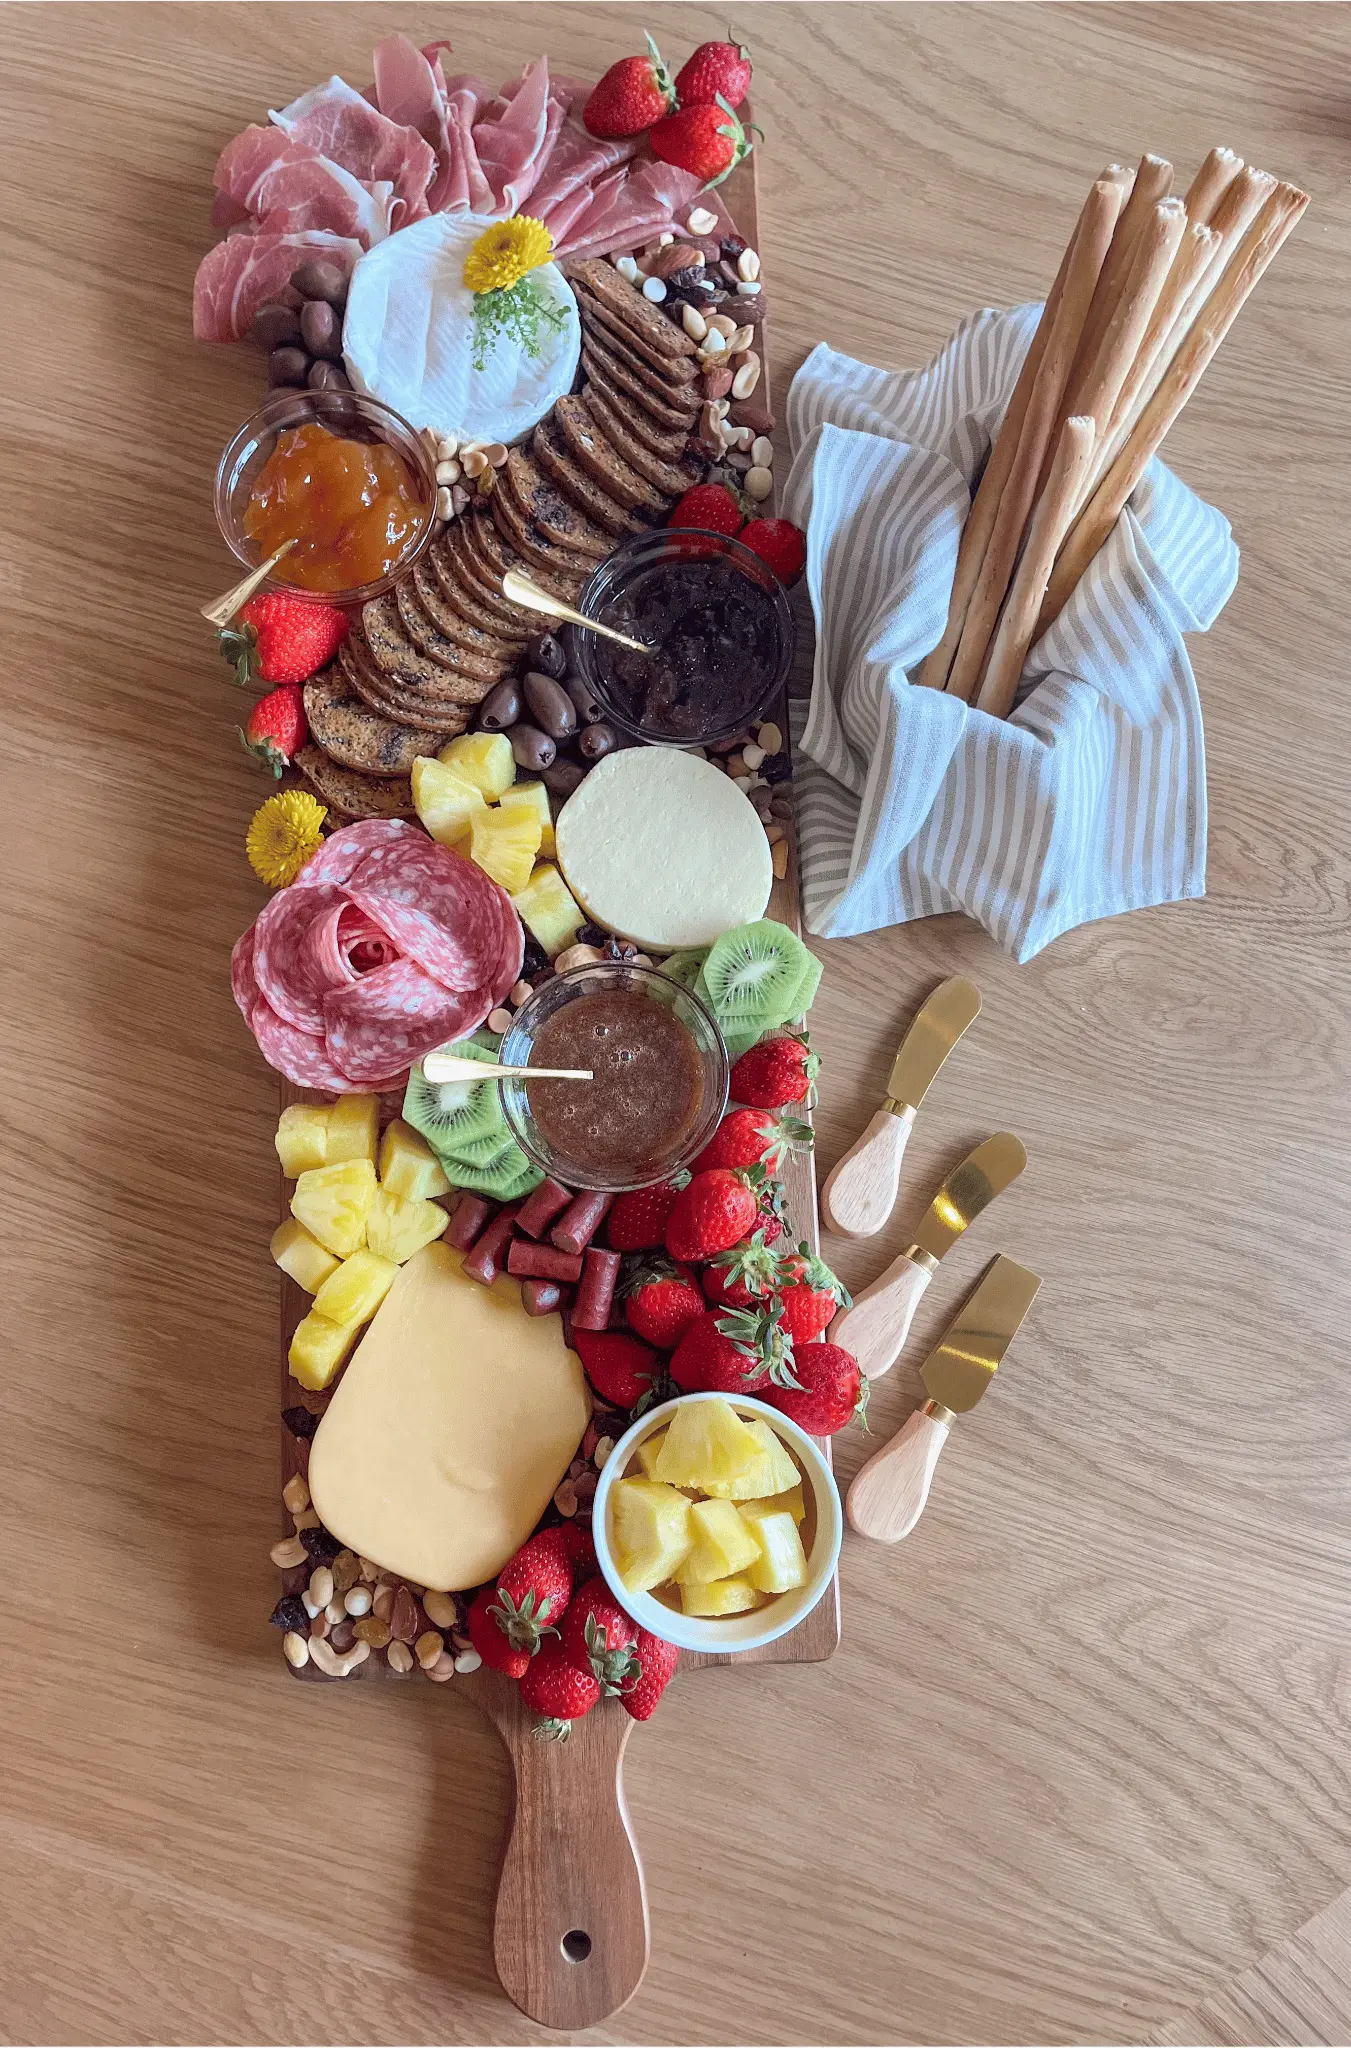
- 3 kinds of cheese – one soft cheese (like brie or goat cheese), one hard cheese (like smoked gouda, sharp cheddar, or parmesan), and one cheese of choice (whatever is standing out to you at the store!)
- 3 kinds of meats – one hard (like salami or soppressata), one soft (like prosciutto), one meat of choice (maybe something peppered or a spicy option)
- 3 kinds of dip or spreads – such as hummus, Moroccan honey (1/4 cup honey + 1 tsp The Spice Girl Kitchen Moroccan Seasoning), olive tapenade, balsamic reduction, or various jams
- 3 kinds of “snacks” – such as nuts, olives, pickles, sundried tomatoes, or roasted red peppers
- at least 3 colors – in your fruit and veggie display (such as strawberries paired with blueberries and pineapple)
- 3 types of carbs – a variety of crackers, breadsticks, and bread
Finish it off by considering your garnish. Fresh flowers would be a perfect addition in the spring! I love using miniature daisies for an unexpected visual. Or you can use herbs such as fresh thyme, mint, rosemary, or dill.
Spring Fruits & Veggies
Using seasonal produce creates that extra “wow” factor because it makes your board seem intentional & thought out. Of course, with current farming practices, we can find almost every fruit and vegetable year-round these days. So while I encourage using as much seasonal produce as possible, feel free to use any fruit or veggie combo that you enjoy!
The fruits & veggies that I think would work best on a spring charcuterie are:
- Apricots (dried or fresh)
- Kiwi
- Pineapple (dried or fresh)
- Strawberries
- Arugula (can be used for a bed as a pop of green, but would also pair well on a board with crostini, blistered tomatoes, and balsamic reduction)
- Radish (works well on boards with hummus, adds a great crunch factor, and looks like little easter eggs!)
- Artichokes (my favorite are grilled artichoke halves in a jar)
You can find a more extensive list of seasonal produce here.
Make it POP
Is there anything more fun than tablescape?! “Making it pop” is the fun part. This is where your personality comes alive. This is more of an expressive art form – the cherry on top!
Dress it up by using your best wooden butcher block or serving tray. Consider the bowls and serving utensils for your dips, cheeses, and bread (I got my glass mini bowls from the dollar store in a pack of 4!). Feel free to incorporate baskets, seasonal napkins, or little signs that tell your guests what’s what. You can play with depth and dimension with tiered serving trays or bowls that vary in height and circumference. Nothing has to match, just play with it and see what happens!
Here are some of my favorites:
- a neutral table runner
- a yellow-striped table runner
- wooden serving board option
- my tiered serving tray
- my charcuterie board accessories (highly recommend!)
- my extra-long serving board
- my adorable honey dipper
Charcuterie Tips
The unique and wild arrangement of charcuterie is what makes it beautifully yours. So don’t focus on straight lines and perfectly placed items. Add a curve in your crackers, make a pile of raspberries, shape your charcuterie like a bunny, fill the tray then let it spill onto the table – the sky is the limit!
With that being said, there are a few tips I’d like to let you in on as you start to build your charcuterie.
- Start with the largest items, such as the cheeses or maybe certain bowls that you know you want to use.
- Decide if you want a fun shape, such as a curve in your crackers or a salami rose. Place your shape next and build around it.
- Cover the whole board by using your smaller items as fillers. Do you see a smidge of the board between a bowl and some cheese? Fill it with some nuts, olives, or blueberries!
- Finish with a garnish. Mini daisies, a fresh flower, or fresh herbs.
Bonus tip: Don’t be afraid to make store-bought items your own. For example, I often make Moroccan Honey or Thai Hummus simply by mixing my spice blends into the basic honey or hummus. It adds a little unexpected flair!
Whew! That was a lot. If you hung in with me through all of that, you’re a real one and I hope you feel inspired to eat some cheese now!
The Ultimate Easter Charcuterie
Ingredients
Method
- Assemble everything on a board. Get creative!
Notes
- Start with the largest items, such as the cheeses or maybe certain bowls that you know you want to use.
- Decide if you want a fun shape, such as a curve in your crackers or a salami rose. Place your shape next and build around it.
- Cover the whole board by using your smaller items as fillers. Do you see a smidge of the board between a bowl and some cheese? Fill it with some nuts, olives, or blueberries!
- Finish with a garnish. Mini daisies, a fresh flower, or fresh herbs.
This post was all about how to build the ultimate Easter charcuterie board.
Did you make this recipe? Make sure to tag me @thespicegirlkitchen_ on Instagram or @thespicegirlkitchen on TikTok! I love seeing your recreations! I will be your ultimate hype woman!
Want to learn more about Kelsey? Click here to read her story!

