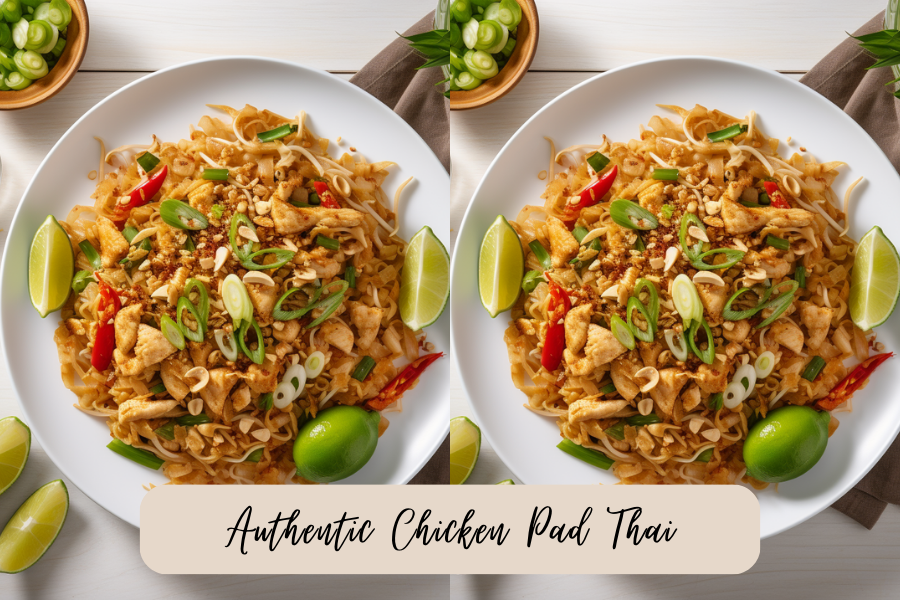
Pad Thai is one of Thailand’s most beloved (and famous) dishes and this Authentic Chicken Pad Thai Recipe will bring all the flavors of Thailand to your kitchen table.
This post contains affiliate links, which means I’ll receive a commission if you purchase through my link, at no extra cost to you. Please read the full disclosure here.
I LOVE Thai food. It scratches an itch that just can’t be scratched by anything else. One of my favorite things about Thai food is its ability to be customized. This recipe could easily be used with shrimp or tofu instead of chicken, for example. And the veggies and spicy level can all be altered to your liking.
In this recipe, I use my salt-free Thai spice blend from my spice company – The Spice Girl Kitchen. I’m completely biased because it is, after all, my spice recipe and the best Thai seasoning on the market. But feel free to use whatever Thai seasoning you have on hand.
My Thai seasoning is unlike anything on the market because it contains peanut butter powder. It smells like Thai Peanut Sauce in a seasoning, what’s not to love about that?!
This post is all about Authentic Chicken Pad Thai!
Pad Thai History
As I already mentioned, Pad Thai is the most famous Thai dish. The general belief is that Pad Thai made its debut in Thailand in the 1930s as part of a campaign to modernize and nationalize Thai cuisine. It was introduced during the rule of Plaek Phibunsongkhram, the Prime Minister of Thailand at the time, as a way to promote Thai identity and culture. Man, that was quite a successful campaign considering it is the most famous Thai dish to this day!
Today, Pad Thai is commonly found as street food in Thailand. It’s quick to prepare and immensely popular worldwide. [the_ad id=”3378″]
Ingredient Deep Dive
Rice Noodles
Pad Thai is typically made with flat rice noodles, which give the dish its distinctive chewy texture.
Protein of Choice
While Pad Thai can be made with various proteins, the most common choices are shrimp, chicken, tofu, or a combination of these.
Tamarind Paste
The tangy and slightly sweet flavor of Pad Thai comes from tamarind paste, which is a key ingredient in the sauce. Tamarind paste is a condiment used in Southeast Asian and Indian cuisine. It’s made by extracting the pulp from tamarind and cooking it with a touch of sugar and fish sauce.
Fish Sauce
When you think fish sauce, think umami. It also contributes to the salty and savory flavors of the dish.
Sugar
The not-so-secret culinary secret to balancing acidity is through the use of sugar. I wouldn’t skip this step as it helps balance the flavors of the dish.
Eggs
Don’t sleep on the eggs! Scrambled eggs are an essential component, providing additional texture and protein.
Bean Sprouts
We all love added crunch and freshness! The bean sprouts are added at the end for that satisfying texture.
Ground Peanuts
No Pad Thai is complete without a dusting of crushed peanuts on top for a delightful crunch and nutty flavor.
Lime
Garnish your Pad Thai with lime wedges. The lime flavor pairs beautifully with the other flavors and allows each individual to adjust the dish’s acidity to their liking.
What Makes Pad Thai Different?
Flavor Balance
Firstly, think of Pad Thai as a symphony of flavors working in harmony. Pad Thai is known for its perfect balance of sweet, salty, sour, and umami flavors. The balance in flavor is what truly makes this dish memorable.
Tamarind Base
Unlike other Thai dishes, Pad Thai relies heavily on tamarind paste for its distinct sourness and flavor. This sets it apart from dishes like Green Curry or Tom Yum, which have different flavor profiles.
Rice Noodle Dish
Most Thai dishes use rice as the primary starch, but Pad Thai is a noodle dish. The use of rice noodles distinguishes it from many other Thai dishes.
Customization
Generally, Pad Thai is incredibly versatile! Swap chicken for shrimp or tofu. You can even do a combination of proteins. Additionally, you can adjust spiciness through the use of chili flakes or add in different veggies.
Is Pad Thai Gluten Free?
Since Pad Thai uses rice noodles instead of regular flour-based noodles, this dish is naturally gluten-free. However, making a dish truly gluten-free all boils down to if each ingredient is gluten-free. So while rice noodles don’t typically contain gluten, some brands might. So be sure to double-check!
It’s also important to make sure your fish sauce (or if you choose to use soy sauce) is also gluten-free as some brands contain wheat as an ingredient. Lastly, if you are ordering Pad Thai at a restaurant – check with your server to verify if their version is truly gluten-free or not. [the_ad id=”3378″]
You Might Also Like
If you like this recipe, check out my other Thai recipes:
OR click here for the entire Thai category!
Store & Reheat
Store
Fridge: Transfer Pad Thai to a large glass storage container with an airtight lid. Allow the dish to cool to room temperature before securing the lid (about 30-45 minutes; the exact time depends on the amount of Pad Thai). Store in the fridge for up to 4 days.
Freezer: Not recommended.
Reheat
Microwave: Place Pad Thai in a microwave-safe dish, cover, and microwave on high for 1-3 minutes or until heated through. Stir halfway through to warm it evenly.*
Stovetop: Place Pad Thai in a pot over medium heat with a splash of chicken broth to keep it from drying out. Once the broth starts to simmer, reduce to medium-low and cover for 3-5 minutes or until heated through. Stir occasionally.*
Oven: Not recommended.
* Total time depends on the amount you are reheating. [the_ad id=”3378″]
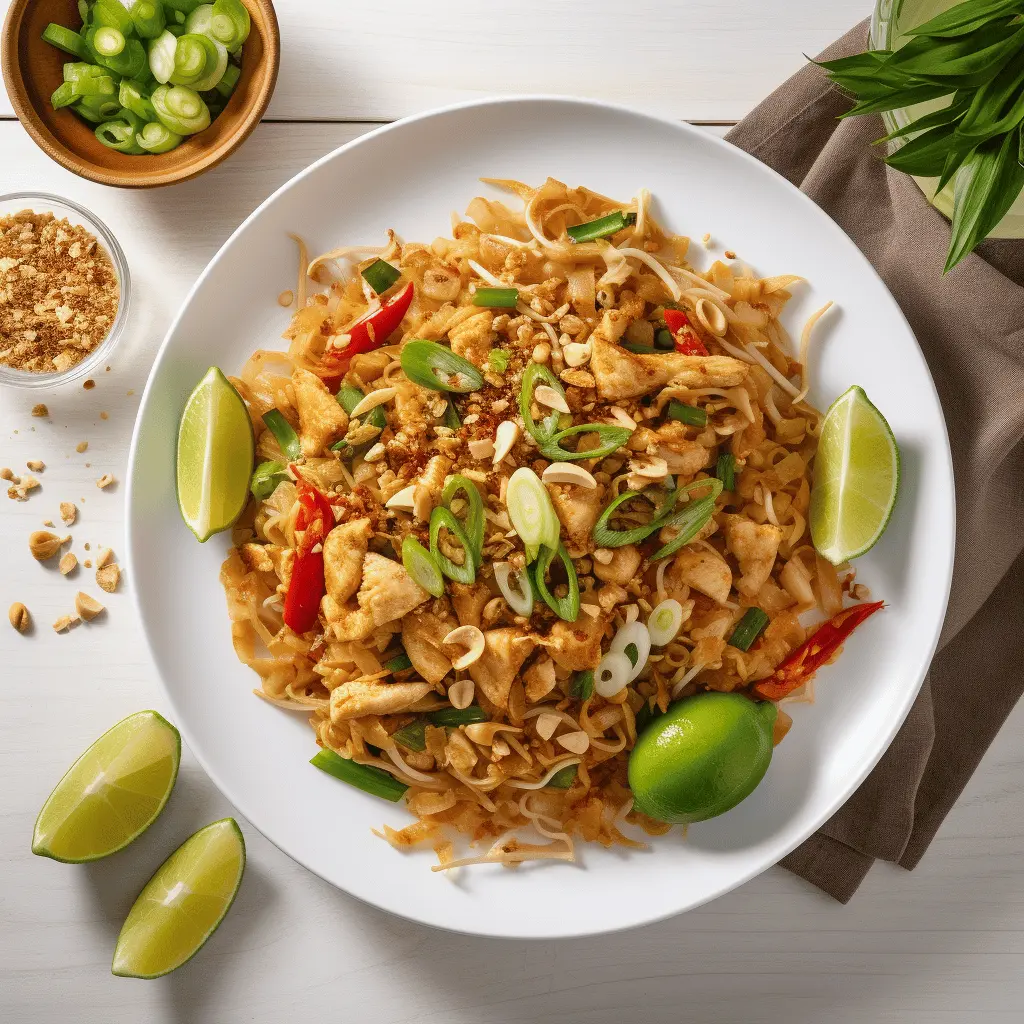
Authentic Chicken Pad Thai
Ingredients
Method
- Place the rice noodles in warm water and set aside to soak for about 30 minutes until they become pliable while you move on to the other steps. Drain when the time is up.
- In a small bowl, mix together the tamarind paste, fish sauce, sugar, and lime juice to make the Pad Thai sauce. Adjust the ingredients to taste if needed. Set aside.
- Heat the oil in a wok or large skillet over medium-high heat. In a bowl, toss the cubed chicken with the Thai seasoning. Add the chicken to the skillet and cook undisturbed for 2 minutes per side until cooked through (internal temperature 165 ℉).
- Add the garlic and stir for about 30 seconds. Push the ingredients in the pan to one side and pour the beaten eggs into the other side. Scramble the eggs until they are just set.
- Add the drained rice noodles to the pan and pour the Pad Thai sauce over them. Toss everything together until the noodles are coated with the sauce and heated through.
- Stir in half of the bean sprouts and green onions and cook for an additional minute.
- Serve the Pad Thai hot, garnished with the remaining bean sprouts, green onions, crushed peanuts, lime wedges, and red pepper flakes if you like it spicy.
Notes
Store & Reheat
Store
Fridge: Transfer Pad Thai to a large glass storage container with an airtight lid. Allow the dish to cool to room temperature before securing the lid (about 30-45 minutes; the exact time depends on the amount of Pad Thai). Store in the fridge for up to 4 days. Freezer: Not recommended.Reheat
Microwave: Place Pad Thai in a microwave-safe dish, cover, and microwave on high for 1-3 minutes or until heated through. Stir halfway through to warm it evenly.* Stovetop: Place Pad Thai in a pot over medium heat with a splash of chicken broth to keep it from drying out. Once the broth starts to simmer, reduce to medium-low and cover for 3-5 minutes or until heated through. Stir occasionally.* Oven: Not recommended. * Total time depends on the amount you are reheating.This post was all about Authentic Chicken Pad Thai!
Did you make this recipe? Make sure to tag me @thespicegirlkitchen_ on Instagram or @thespicegirlkitchen on TikTok! I love seeing your recreations! I will be your ultimate hype woman!
Want to learn more about Kelsey? Click here to read her story!

