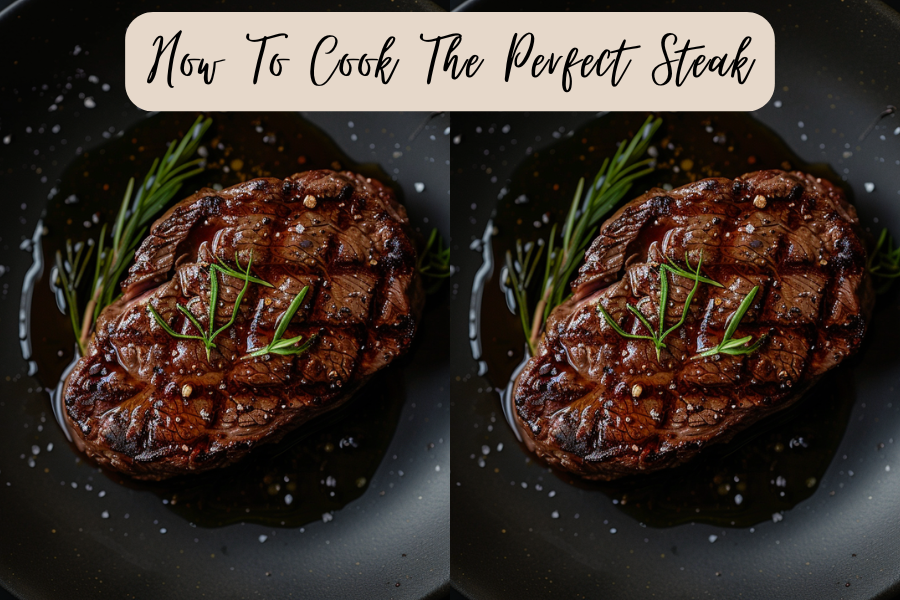
Always wanted to know the ins and outs of how to cook the perfect steak? In today’s posts, we will cover everything you need to know to master this fundamental cooking practice!
This post contains affiliate links, which means I’ll receive a commission if you purchase through my link, at no extra cost to you. Please read the full disclosure here.
Choosing the Right Cut
The first step to a great steak is selecting the right cut. Different cuts offer different flavors, textures, and levels of tenderness:
- Ribeye: Known for its rich marbling and intense flavor, ribeye is juicy and flavorful, making it a favorite among steak lovers.
- Sirloin: A leaner cut with a robust taste, sirloin is versatile and relatively affordable, great for those who prefer less fatty meat.
- Filet Mignon: Exceptionally tender with a mild flavor, filet mignon is prized for its tenderness and is usually the most expensive cut.
- T-Bone/Porterhouse: Combines the best of both worlds with a strip steak on one side and tenderloin on the other, offering a variety of textures and flavors in one cut.
For beginners, a ribeye or sirloin is a great starting point due to their forgiving nature and flavor.
[the_ad id=”3378″]
Preparing the Steak
Preparation is key to a perfect steak:
Bring to Room Temperature
- What to Do: Let the steak sit out for 30-60 minutes.
- Why It’s Important: A steak at room temperature cooks more evenly. Cold meat hitting a hot pan or grill can cause the exterior to cook faster than the interior, leading to an unevenly cooked steak.
Pat Dry
- What to Do: Pat the steak dry with paper towels.
- Why It’s Important: Moisture on the surface of the steak prevents it from searing properly, resulting in a grayish, boiled look instead of a rich, brown crust.
Season Generously
- What to Do: Sprinkle a generous amount of salt and pepper on both sides of the steak. Optional: add garlic powder, thyme, rosemary, Okie Rub, or Cuban.
- Why It’s Important: Salt draws out moisture and then reabsorbs it, breaking down muscle proteins and enhancing flavor. It also helps in forming a flavorful crust.
Essential Equipment
Having the right tools makes all the difference:
- Cast Iron Skillet or Grill: For a perfect sear, these tools retain and distribute heat evenly.
- Tongs: For flipping without piercing the meat, which helps retain juices.
- Meat Thermometer: For checking doneness with precision, ensuring your steak is cooked exactly how you like it.
Optional but helpful tools include an oven for finishing thicker cuts, a brush for basting, and aluminum foil for resting.
[the_ad id=”3378″]
Cooking Techniques
Two primary methods are pan-searing and grilling:
Pan-Seared Steak
Heat the Pan
- What to Do: Heat a cast iron skillet over high heat until smoking hot.
- Why It’s Important: A hot pan ensures a good sear, creating a flavorful crust without overcooking the inside.
Add Oil
- What to Do: Add oil with a high smoke point (like avocado oil).
- Why It’s Important: Oils with high smoke points can withstand the high heat needed for searing without burning.
Sear the Steak
- What to Do: Sear the steak for 2-3 minutes on each side to form a crust.
- Why It’s Important: Searing caramelizes the surface, developing complex flavors through the Maillard reaction.
Maillard Reaction: This chemical reaction between amino acids and reducing sugars gives browned food its distinctive flavor. Achieving a good sear maximizes this reaction, creating a complex, savory crust.
Add Butter and Aromatics
- What to Do: Add butter, garlic, and herbs (like thyme or rosemary) to the pan and baste the steak.
- Why It’s Important: Basting with butter adds rich flavor and helps the aromatics infuse into the steak.
Fat Rendering: Marbled fat melts during cooking, basting the meat from within and adding flavor and juiciness. Proper searing helps render the fat effectively.
Finish in the Oven
- What to Do: Transfer the skillet to a preheated oven if needed, and cook until the desired doneness.
- Why It’s Important: Finishing in the oven ensures even cooking, especially for thicker cuts.
Protein Denaturation: As the steak heats, proteins unwind and coagulate, which changes the meat’s texture. Controlling the temperature ensures tender, juicy meat.
[the_ad id=”3378″]
Grilled Steak
Preheat the Grill
- What to Do: Preheat the grill to high heat.
- Why It’s Important: High heat is essential for creating grill marks and a good sear.
Sear Over Direct Heat
- What to Do: Sear the steak over direct heat for 2-3 minutes per side.
- Why It’s Important: Direct heat gives a quick sear, locking in juices and creating a crust.
Move to Indirect Heat
- What to Do: Move the steak to indirect heat and continue cooking until desired doneness.
- Why It’s Important: Indirect heat cooks the steak evenly without burning the exterior.
Manage Flare-Ups
- What to Do: Use the grill lid to control flare-ups.
- Why It’s Important: Flare-ups can char the steak too much; the lid helps maintain even heat and prevent excessive burning.
[the_ad id=”3378″]
Doneness Levels
Knowing your preferred doneness is crucial:
- Rare: 120-130°F (cool red center)
- Medium-Rare: 130-135°F (warm red center)
- Medium: 135-145°F (warm pink center)
- Medium-Well: 145-155°F (slightly pink center)
- Well-Done: 155°F and above (little to no pink)
How to Check Doneness:
- Meat Thermometer: Insert into the thickest part without touching bone or fat.
- Visual and Touch Test: Compare the firmness of the steak to the base of your thumb when touching your thumb to different fingers.
Resting the Steak
- What to Do: Let the steak rest for 5-10 minutes after cooking.
- Why It’s Important: Resting allows the juices to redistribute, ensuring a juicy steak. Cutting too soon lets the juices escape, resulting in a drier steak.
Serving the Steak
Slice Against the Grain
- What to Do: Slice the steak against the grain.
- Why It’s Important: Cutting against the grain shortens the muscle fibers, making the steak more tender and easier to chew.
Accompaniments
- Suggestions: Classic pairings include a garlic butter sauce, roasted vegetables, or a crisp salad.
- Why It’s Important: Complementary sides enhance the overall dining experience and balance the richness of the steak.
Presentation
- Tips: Arrange the slices neatly on a plate with your chosen sides for an appealing meal.
- Why It’s Important: A well-presented dish is visually appealing and adds to the dining pleasure.
[the_ad id=”3378″]
Common Mistakes to Avoid
Avoid these pitfalls:
- Overcrowding the Pan
- Why It’s Important: Crowding cools the pan and prevents a good sear. Cook in batches if necessary to maintain high heat.
- Cooking Straight from the Fridge
- Why It’s Important: Cold meat cooks unevenly. Letting it come to room temperature ensures even cooking throughout.
- Cutting Too Soon
- Why It’s Important: Cutting before resting causes juices to escape, resulting in a drier steak. Patience ensures a juicier, more flavorful bite.
Storage and Reheating Tips
Got leftovers? No problem!
Storage: Wrap the steak tightly in foil or plastic wrap and refrigerate for up to 3 days.
Reheating: Reheat gently in a low oven (250°F) until warmed through, or use a skillet with a bit of oil over low heat. Avoid microwaving as it can make the steak tough.
Cooking the perfect steak takes a bit of practice, but with these tips, you’ll be well on your way to steak perfection. So fire up your skillet or grill, season with confidence, and enjoy every juicy bite. Happy cooking!
[the_ad id=”3378″]
This post was all about How To Cook The Perfect Steak.
Did you try these tips? Make sure to tag me @thespicegirlkitchen_ on Instagram or @thespicegirlkitchen on TikTok! I love seeing you CRUSH IT! I will be your ultimate hype woman!
Want to learn more about Kelsey? Click here to read her story!


